The 'Jobs' tab contains seven sub-tabs:
- Unsubmitted
- In Estimating
- Waiting for price approval
- Pending
- In Progress
- Waiting for Payment
- Completed
Jobs that are 'In Progress' are jobs that have already been started.
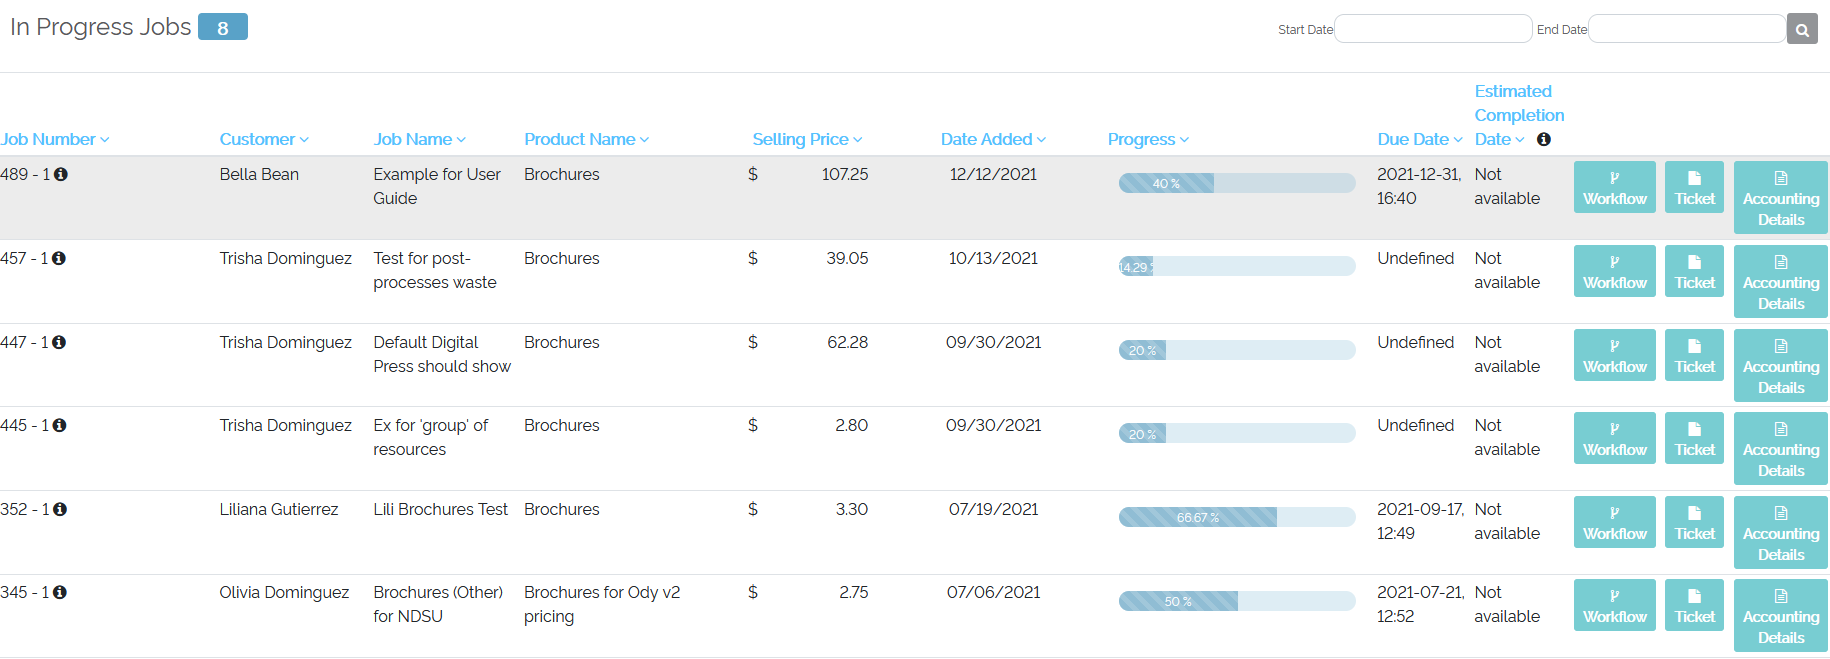
Example of 'In Progress' jobs
- Users may select the Job Number's 'i' icon
 to reveal the website's Control Center Order and Job number.
 - Every column within 'In Progress Jobs' can be sorted ascending or descending
Workflow Button
- Selecting the 'Workflow' button will open up the job workflow
- The 'Status' of the job overall will be shown in the upper-right below the 'Due date'
- The selling price (the agreed upon price between the printshop and printbuyer), estimated cost and estimated profit are show in the top-middle section of the job workflow
- The Job Name, Product the order came from, Quantity and the Cost By Product is shown on the left-hand side under the Job number
- If any processes have been not been started, have been started, or completed, the progress of each process will show above the process name
Additional details
Additional details such as files sent for the job, chat and more are contained within the 3 blues dot to the right of a job number. Example:
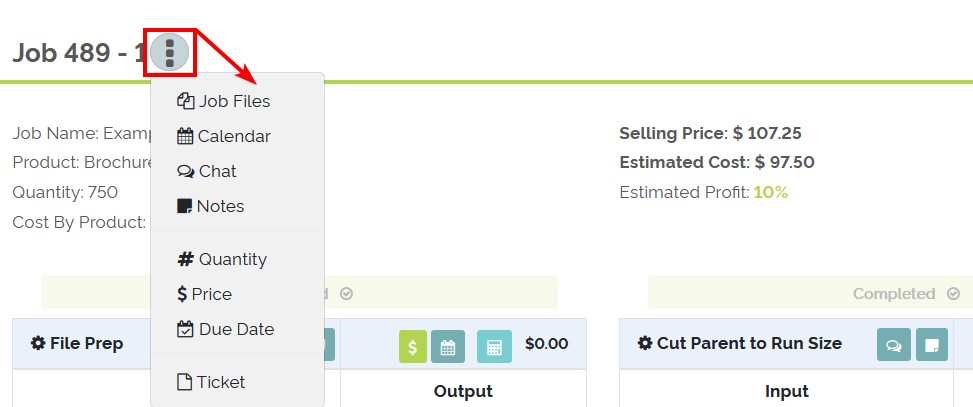
Example of 3 dots next to job number opened up to reveal additional functionality
- Users may access any file associated with the job by selecting 'Job Files
- Users may access the calendar of the job, showing when each process is scheduled to run in production, by selecting 'Calendar'
- Users may access the chat for the job overall to have a chat with the printbuyer or other printshop employees by selecting 'Chat'
- Uses may access the job notes by selecting 'Notes'
- This will allow a user to add a note to the job as well as view any notes for the processes within the job
- Users may adjust the Quantity of the job by selecting '# Quantity'
- Users may adjust the price of the job by selecting '$ Price'
- Users may edit the due date by selecting 'Due date'
Start, Finish and Complete
- To start the first process of a job, the 'Pending Job' must have the 'Start job' button selected
- This will move the job status to 'In Progress'
- To start the first process of a job, select 'Start'
- To finish the first process of a job, select 'Finish'
- The process will show as 'Completed'
- Upon completing each process, the a pop-up will allow the users will be given the opportunity to send an email to the customer
- Select 'Yes' to send the email
- Select 'No' if you do not want your printbuyer to receive an email after completing said process
- Upon completing each process, the 'Cost' pop-up modal is presented
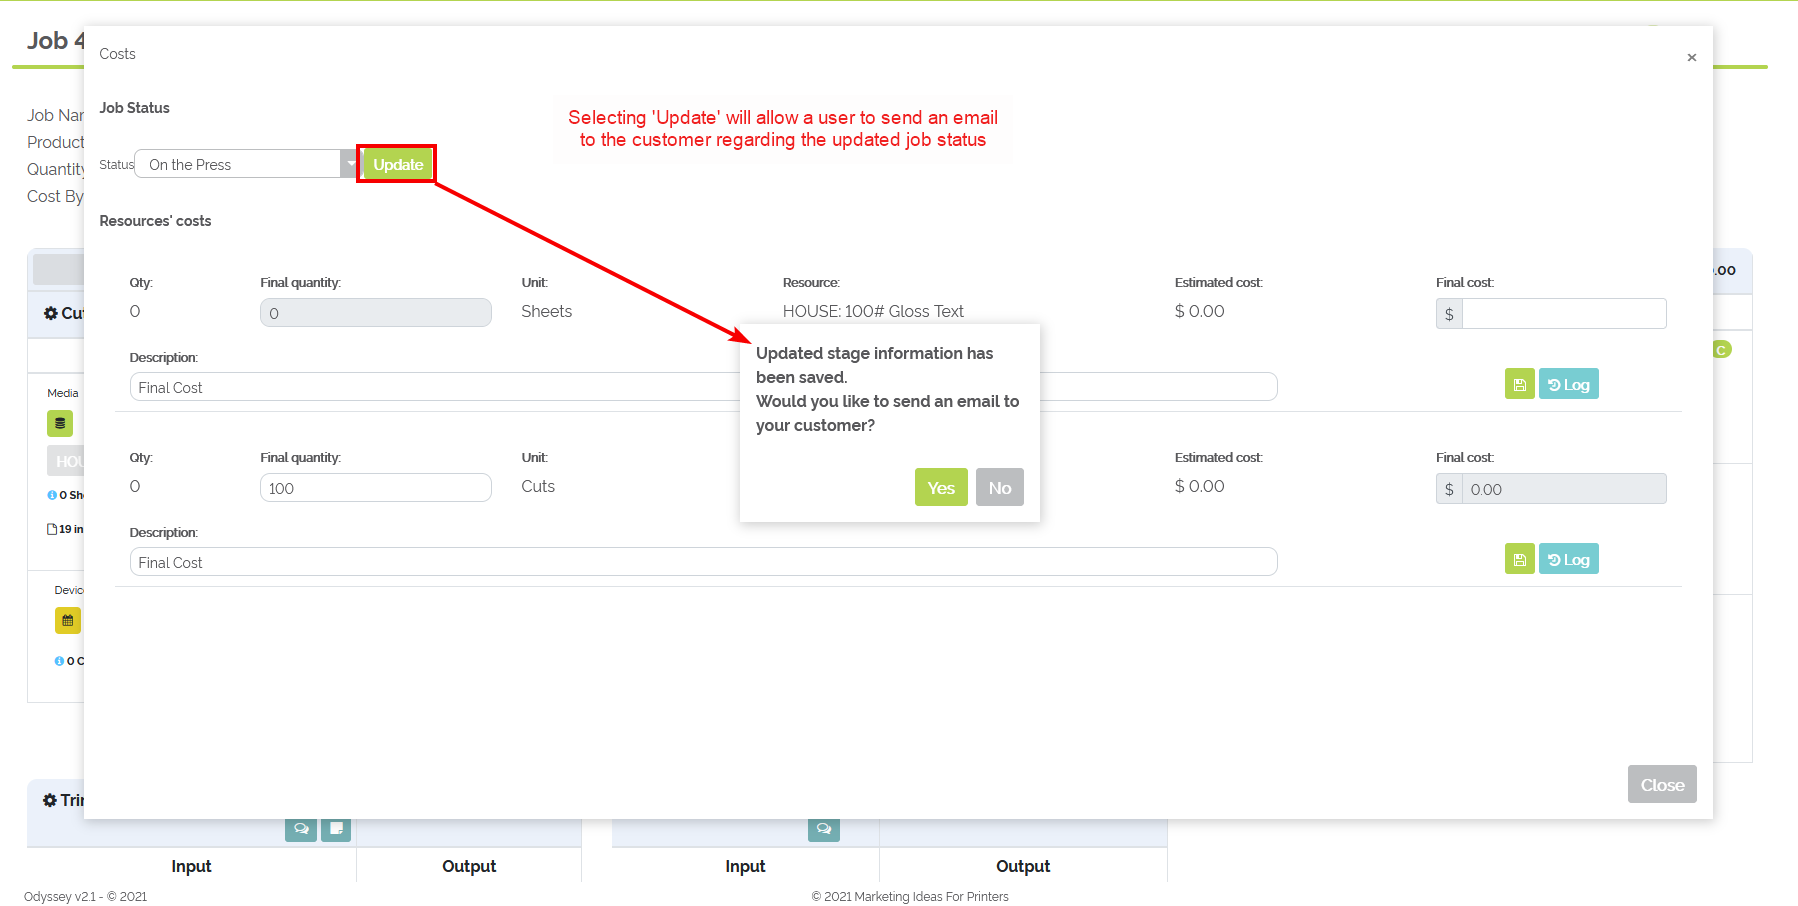
Example of 'Costs' pop-up modal
- Users may select a status next to 'Status'
- Selecting 'Update' will provide the option to send an email to the customer
- Select 'Yes' to send the email
- Select 'No' if you do not want your printbuyer to receive an email after changing the job status
- The process's resources' costs, final quantity, and final cost are also presented
- Select 'Log' to see a log of quantity and costs updates that may have been made to the job
- Select 'Close' to close out of the 'Costs' pop-up modal
- Selecting 'Update' will provide the option to send an email to the customer
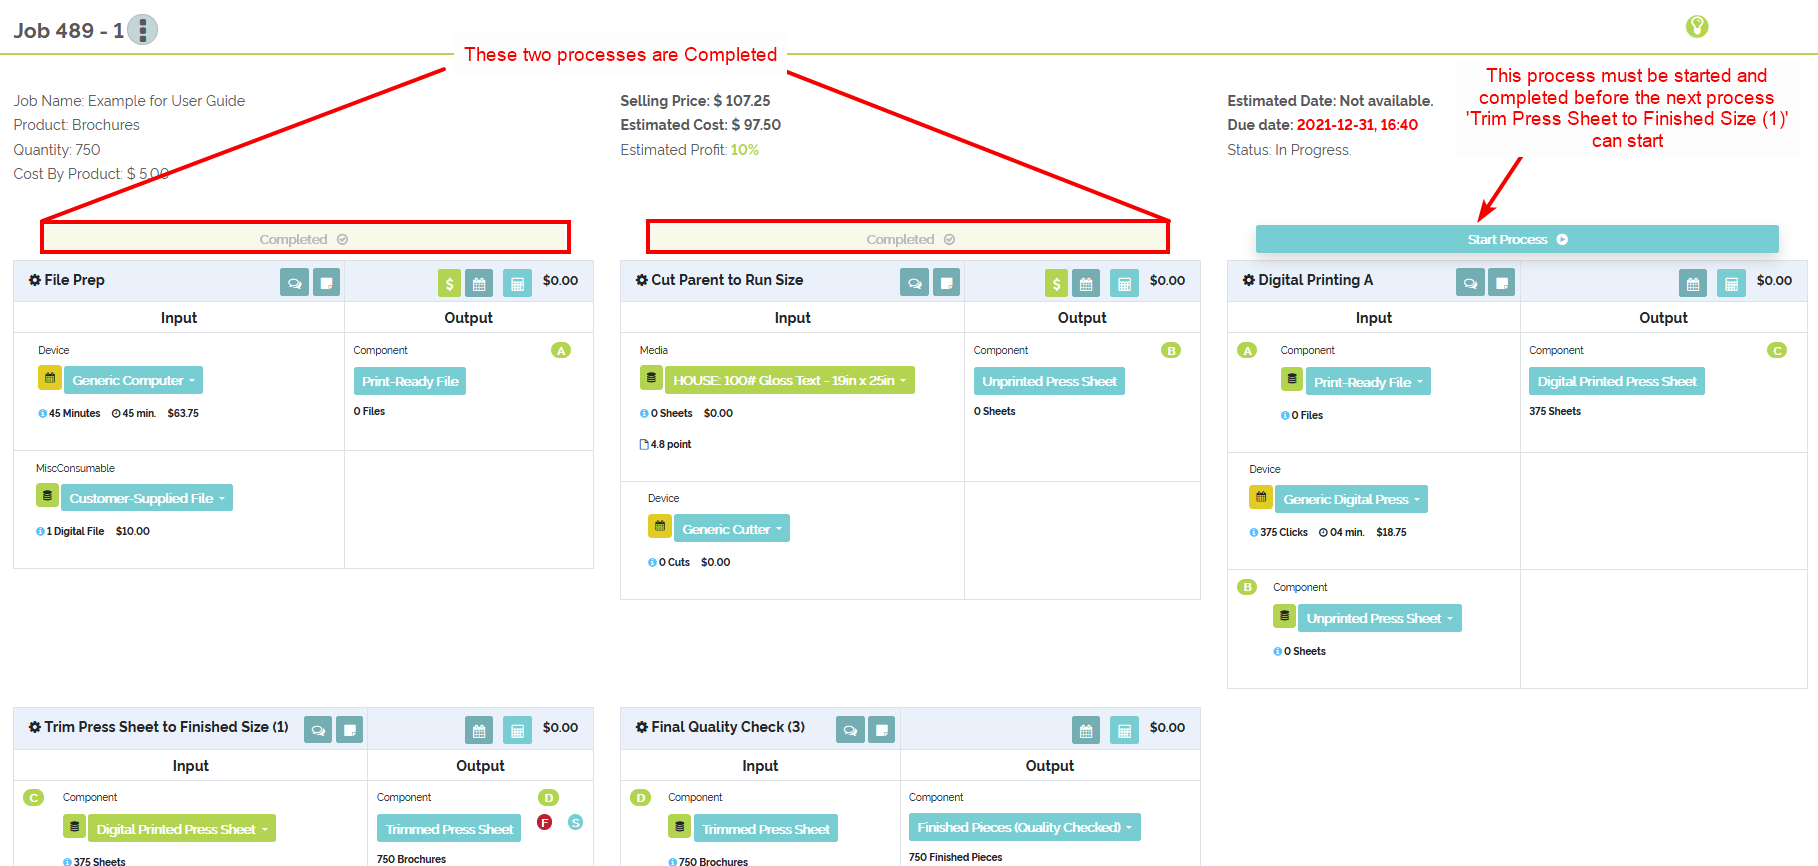
Example of an 'In Progress' job with two processes completed
Ticket Button
- Selecting the 'Ticket' button in the main 'In Progress Jobs' screen will allow a user to save, download or open the job ticket PDF
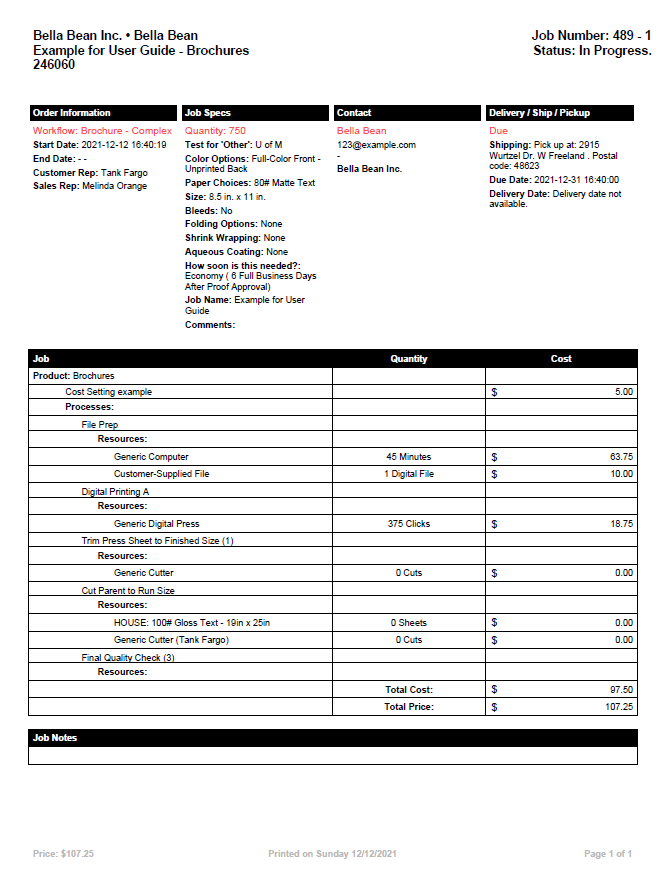
Example screenshot of a PDF job ticket from an In Progress job
Accounting Details Button
- Selecting the 'Accounting Details' button at the main 'In Progress Jobs' screen will show the cost breakdown of each resource
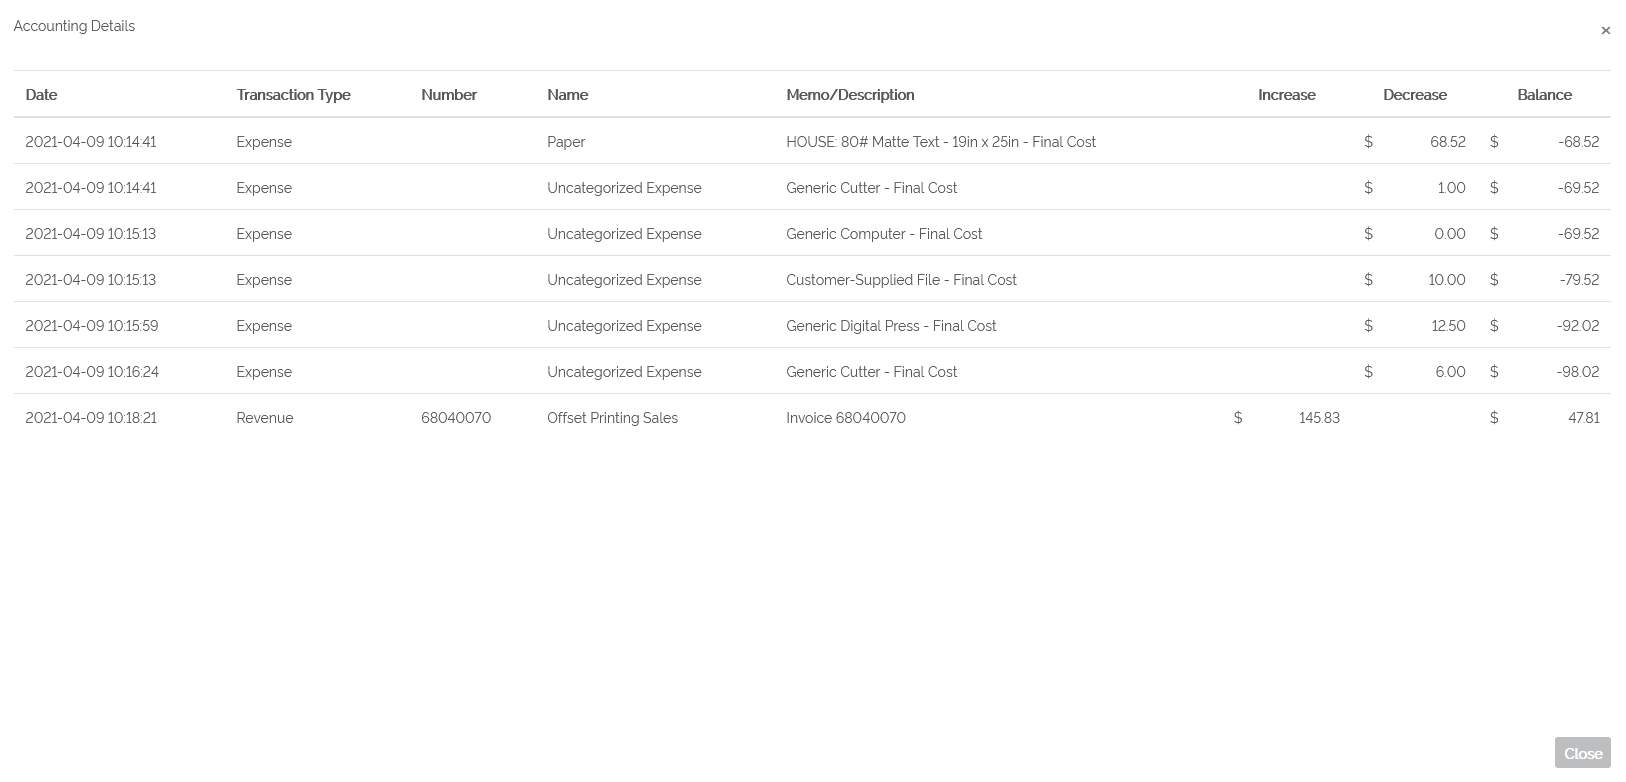
Example of 'Accounting Details' of an 'In Progress' job
Refer to the video below on how to start a job, start and finish each process of a job and complete a job.